1. Why Crawl Spaces Are a Radon Problem
A crawl space is essentially an open chamber of exposed soil directly beneath your living area. That exposed soil is the primary source of radon in any home. While a poured concrete slab creates at least a partial barrier between soil gas and indoor air, a vented crawl space with bare dirt is about as direct a pathway as radon can get.
Georgia has a lot of crawl space homes. The red clay soils across Metro Atlanta expand and contract with moisture, which historically made builders favor crawl space foundations over slabs in many neighborhoods. Older homes in particular (pre-1990) are overwhelmingly crawl space construction. And these homes are sitting on the Piedmont granite belt, which produces some of the highest natural radon concentrations in the Southeast.
Common Misconception
Some homeowners believe that a ventilated crawl space cannot have radon problems because the vents allow air circulation. In reality, crawl space vents provide minimal dilution. In winter, when the stack effect pulls warm air upward through the home, the negative pressure actually draws more soil gas up through the crawl space and into the living area. Vents alone are not a radon solution.
2. How Radon Enters Through a Crawl Space
Radon is a gas. It moves through soil and enters any space where it can find a path of least resistance. In a crawl space home, the process works like this:
Soil Gas Enters the Crawl Space
Radon-laden soil gas seeps through the exposed dirt floor and through cracks in any masonry walls. The entire soil surface acts as a diffuse entry point. Block foundation walls, which are common in Georgia crawl spaces, also allow gas through their hollow cores.
Radon Accumulates in the Crawl Space
Even with vents, crawl space air turnover is limited. Radon builds up in this enclosed volume, especially during still weather and at night when temperature differentials are greatest.
Stack Effect Pulls Crawl Space Air Upward
Warm air rises inside the home and exits through the upper levels. This creates negative pressure at the lower levels, pulling crawl space air (and its radon) up through gaps in the floor system: plumbing penetrations, HVAC ductwork, electrical chases, and gaps where the subfloor meets the band joist.
HVAC Ductwork Accelerates the Problem
Many Georgia homes have HVAC ductwork running through the crawl space. If those ducts have leaks (and most older duct systems do), the air handler actively pulls crawl space air into the duct system and distributes it throughout the home. This can dramatically increase radon levels on the upper floors.
The bottom line: a crawl space does not protect you from radon. In some configurations, particularly homes with leaky ductwork in the crawl space, it can actually make the problem worse by providing a reservoir of radon-rich air that the HVAC system distributes throughout the house.
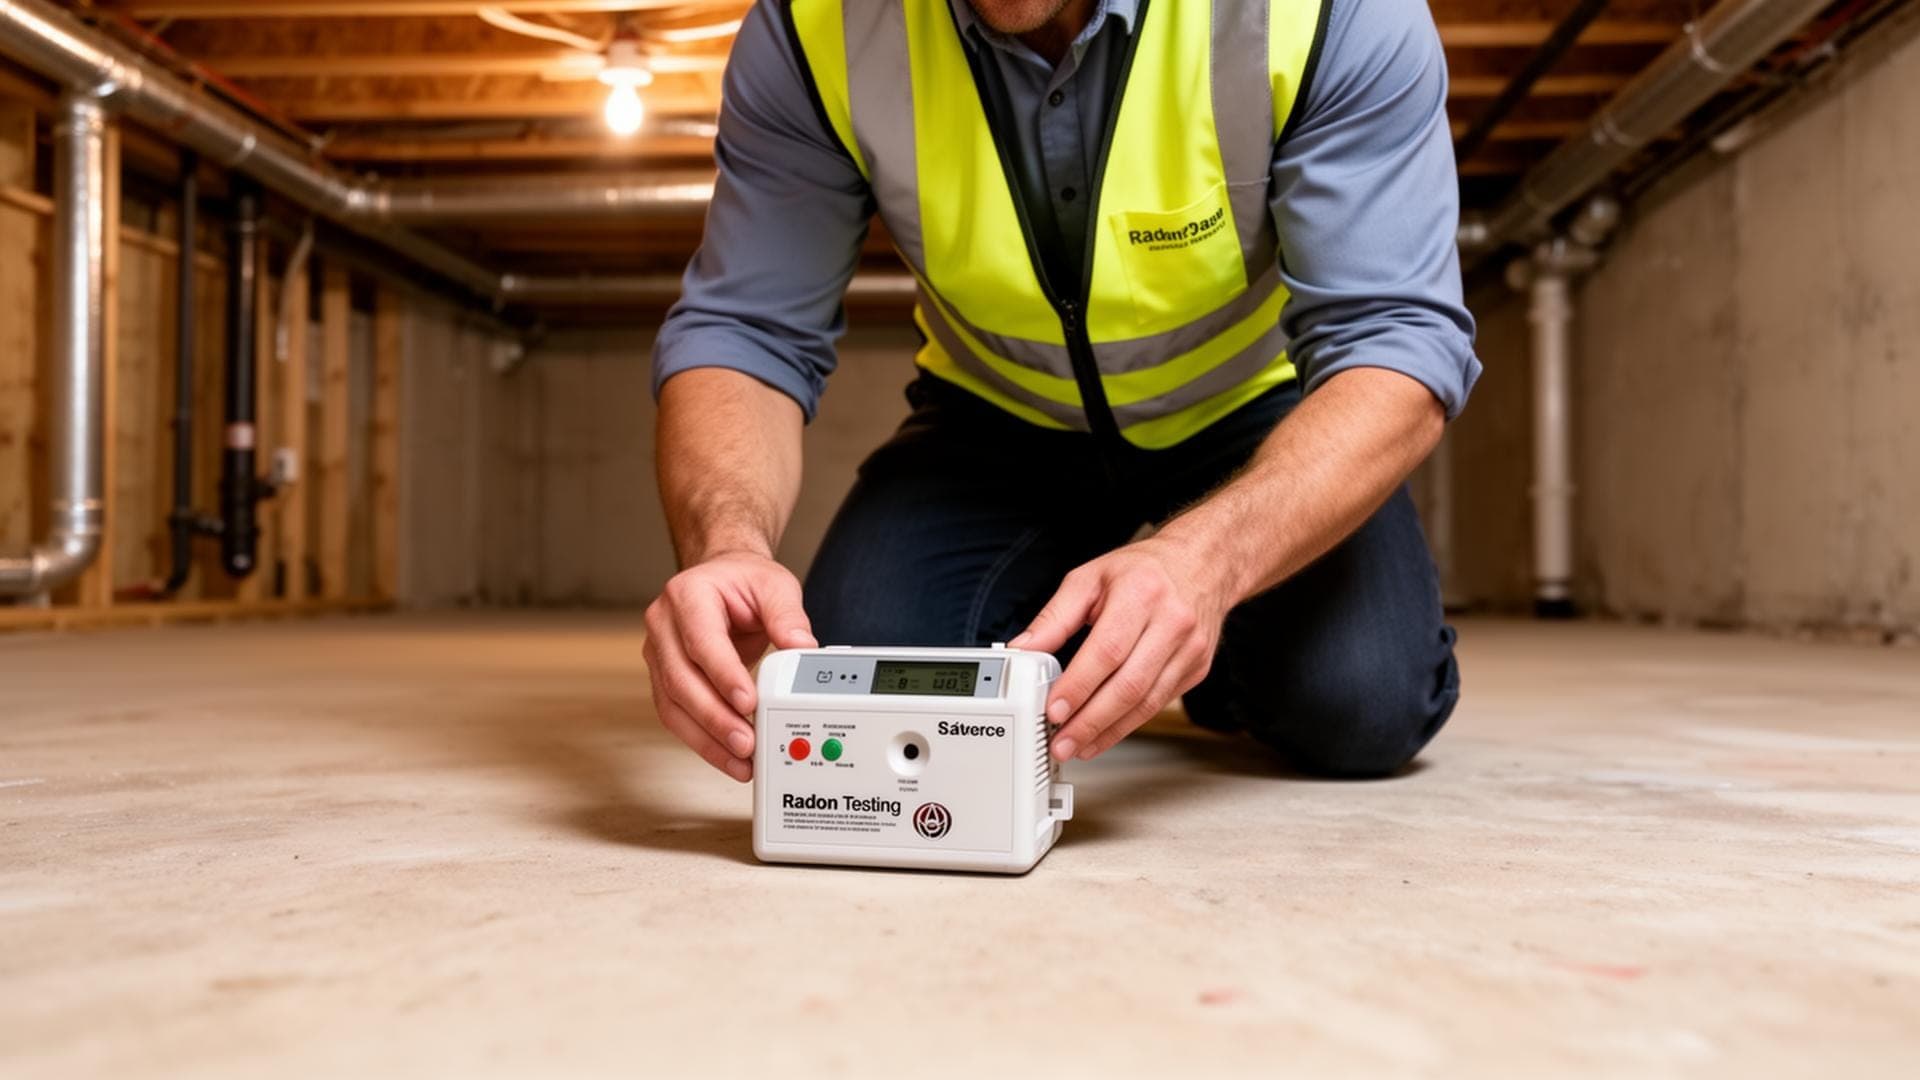
3. Testing Crawl Space Homes
Testing for radon in a crawl space home follows the same basic protocol as any other home, but there are a few specifics that matter.
Where to Place the Test
Place the radon test in the lowest livable area of the home, not in the crawl space itself. For a single-story home on a crawl space, that means the main living floor. For a home with a finished lower level and a partial crawl space, test the finished lower level. The goal is to measure the radon concentration in the air that people are actually breathing.
Why Not Test in the Crawl Space?
Radon levels in the crawl space itself will almost always be elevated. That reading does not tell you what is happening in the living space. A crawl space reading of 20 pCi/L might correspond to a living area reading of 4 pCi/L or 12 pCi/L depending on the floor system, air sealing, and ventilation. The living area measurement is what matters for health decisions.
Professional vs DIY Testing
For a general screening, a DIY test kit can work. For a real estate transaction or for making mitigation decisions, use professional CRM testing. This is especially important in crawl space homes where radon levels can fluctuate significantly with weather and HVAC operation. A CRM provides hourly data that reveals these patterns, while a charcoal kit gives you one average number with no context.
Seasonal Considerations
Crawl space homes tend to show the most dramatic seasonal variation in radon levels. The stack effect is strongest in winter when the temperature difference between indoor and outdoor air is greatest. If you test in summer and get a borderline result (2 to 4 pCi/L), consider retesting in winter. The winter result may be significantly higher.
4. Mitigation Options for Crawl Space Homes
Crawl space radon mitigation is different from slab mitigation. You cannot drill a hole through a slab and install a suction point because there is no slab. The approach needs to account for the exposed soil, the air volume in the crawl space, and the connection between the crawl space and the living area.
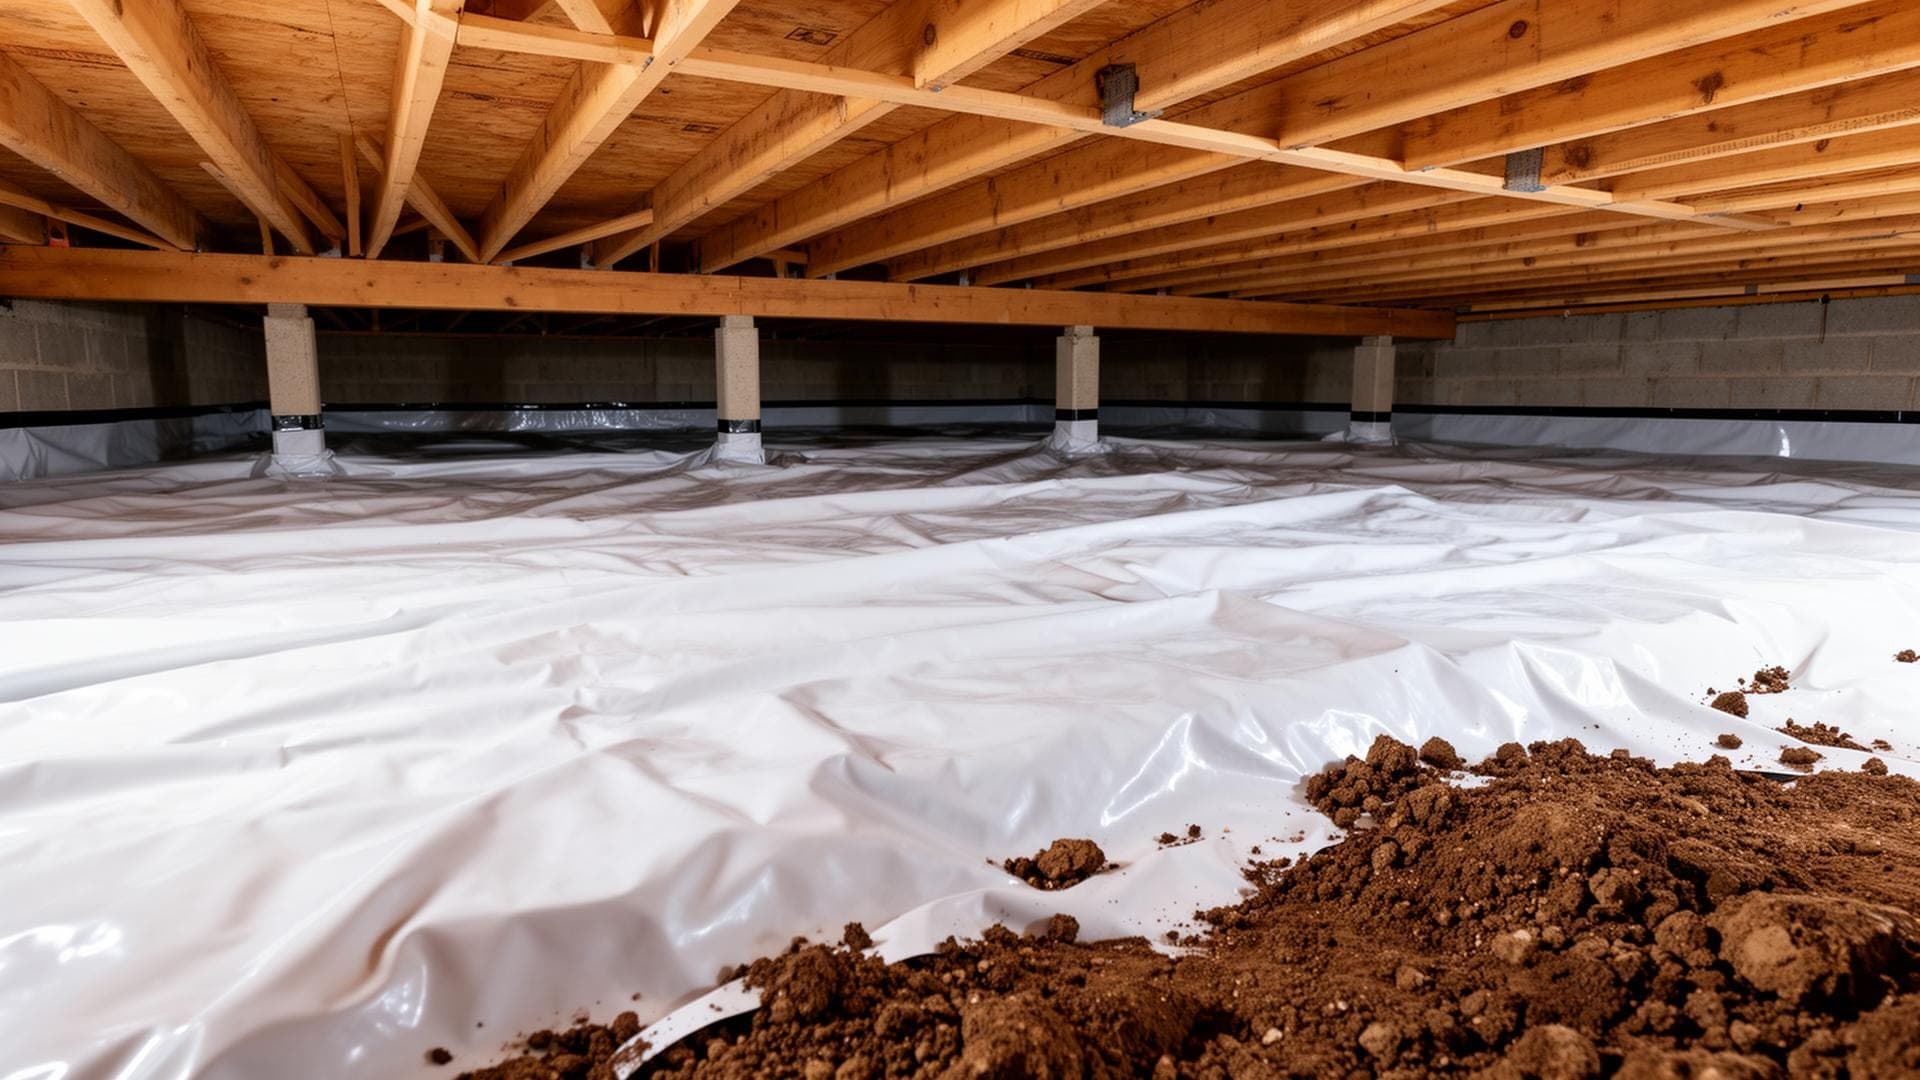
Option 1: Sub-Membrane Depressurization (SMD)
This is the standard and most effective approach for crawl space homes. A heavy-duty polyethylene membrane is sealed over the entire soil surface, creating an airtight barrier. A suction point (perforated pipe or collection pit) is installed beneath the membrane, connected to a PVC pipe that runs to a radon fan. The fan creates negative pressure under the membrane, pulling radon from the soil and exhausting it above the roofline before it can enter the living space.
SMD systems achieve 94 to 97% radon reduction in most installations. This is the same effectiveness range as sub-slab depressurization in slab and basement homes.
Option 2: Crawl Space Ventilation
Increasing crawl space ventilation with powered fans can reduce radon levels, but it is not reliable as a standalone solution. It works by diluting radon with outdoor air, but the effectiveness depends on wind direction, fan sizing, and the crawl space geometry. It also brings in humid outdoor air in summer, which can cause moisture problems, so pairing ventilation with dedicated moisture and humidity control matters in a climate like Georgia's. For these reasons, ventilation alone is generally a secondary or supplemental approach, not a primary fix.
Option 3: Crawl Space Pressurization
In an encapsulated crawl space, a small fan can pressurize the space, creating positive pressure that resists the entry of soil gas. This can work in some situations but requires careful design. If the encapsulation has any significant leaks, the fan cannot maintain positive pressure and the system fails. It is less commonly used than SMD because it is harder to verify performance.
Our Recommendation
Sub-membrane depressurization is the right choice for most crawl space homes. It is proven, measurable, and provides consistent results regardless of weather or seasonal changes. It also provides moisture control benefits as a bonus, since the sealed membrane and active suction reduce humidity in the crawl space. Learn about how radon enters crawl space homes, and review our system maintenance guide for long-term care. Our residential radon services team handles crawl space installations throughout Georgia.
5. Sub-Membrane Depressurization: How It Works
Here is what a proper sub-membrane installation involves:
The Membrane
A minimum 6-mil (0.006 inch) polyethylene sheet is laid over the entire soil surface. Industry best practice uses 10 to 20-mil reinforced poly for durability, especially in crawl spaces with rough or rocky soil. The membrane is sealed to the foundation walls, piers, and any penetrations (plumbing, electrical) with polyurethane caulk or specialized tape. Seams between sheets are overlapped by at least 12 inches and sealed. The goal is an airtight barrier across the entire soil surface.
The Suction Point
One or more suction points are created beneath the membrane. In a small crawl space, a single central point may be sufficient. Larger or irregularly shaped crawl spaces may need two or three points to create uniform suction across the entire area. The suction point is typically a small excavated pit filled with gravel, or a section of perforated PVC pipe, connected to the main vent pipe.
The Vent Pipe and Fan
A 3-inch or 4-inch PVC pipe runs from the suction point through the crawl space, up through or along the exterior of the home, to a discharge point above the roofline. A radon-rated inline fan is installed in this pipe run (always above the living space or outdoors, never in the crawl space). The fan runs continuously, pulling soil gas from under the membrane and exhausting it outdoors where it disperses harmlessly.
System Verification
After installation, a manometer (U-tube pressure gauge) is installed on the pipe to provide a visual indicator that the fan is operating and maintaining suction. A post-mitigation radon test is performed 24 to 48 hours after the system is running to verify that radon levels in the living space have dropped below 4 pCi/L. Most well-installed systems bring levels well below 2 pCi/L.
| Component | Specification | Purpose |
|---|---|---|
| Vapor barrier | 6-mil minimum, 10-20 mil preferred | Seals soil surface, creates airtight layer |
| Sealing | Polyurethane caulk + tape at all edges | Prevents radon bypass around membrane |
| Suction pit | 12" x 12" gravel-filled pit or perforated pipe | Collection point for sub-membrane suction |
| Vent pipe | 3" or 4" Schedule 40 PVC | Routes soil gas from crawl space to roof |
| Radon fan | Radon-rated inline fan, 20-90 CFM | Creates continuous negative pressure |
| Manometer | U-tube or digital pressure gauge | Visual confirmation of system operation |
6. What It Costs
Crawl space radon mitigation costs more than slab-based systems. There is no way around it. You are installing a membrane across the entire soil surface, sealing every edge and penetration, and then adding the same fan and pipe system that a slab home would need. More labor, more materials, higher price.
Slab/Basement Home
$1,200 - $2,500
Sub-slab depressurization
Crawl Space Home
$2,500 - $5,000
Sub-membrane depressurization
What Drives the Cost
For a detailed breakdown of mitigation costs by foundation type, see our complete guide to radon mitigation costs in Atlanta.
Ongoing Costs
The radon fan runs continuously and uses about $50 to $100 in electricity per year. Fans last 5 to 12 years before replacement, which costs $400 to $800 for the fan and installation. The membrane is durable and rarely needs replacement if it was properly installed. Overall, a crawl space radon system is inexpensive to maintain once it is in place.
7. Maintenance and Monitoring
A crawl space radon system needs a little more attention than a slab system because the membrane is exposed to crawl space conditions.
Monthly: Check the Manometer
The manometer on your vent pipe should show a pressure differential when the fan is running. If the fluid levels are even (no differential), the fan may have failed. This takes 10 seconds to check and is the single most important maintenance task.
Annually: Visual Inspection
Once a year, check the crawl space for any membrane damage. Look for tears from pest activity, water intrusion, or work by other contractors (plumbers and electricians sometimes disturb the membrane when accessing crawl space utilities). Repair any tears promptly with poly tape.
Every 2 Years: Radon Retest
The EPA recommends retesting every two years even with a mitigation system in place. Conditions change: soil conditions shift, membrane seals degrade over time, and fan performance decreases as the motor ages. A retest confirms the system is still performing. If the retest shows elevated levels, it usually means the fan needs replacement or a membrane seal has failed, both straightforward fixes.
Bonus: Moisture Control
A properly installed sub-membrane system does double duty. The sealed membrane and active suction significantly reduce moisture levels in the crawl space. Homeowners often notice improvements in musty odors, floor comfort, and humidity levels on the main floor after installation. EPA research has documented measurable drops in crawl space humidity after mitigation, and you can read more about how radon mitigation dries out crawl spaces for the full picture. If you were already considering crawl space encapsulation for moisture reasons, adding radon mitigation to the project is a natural fit.