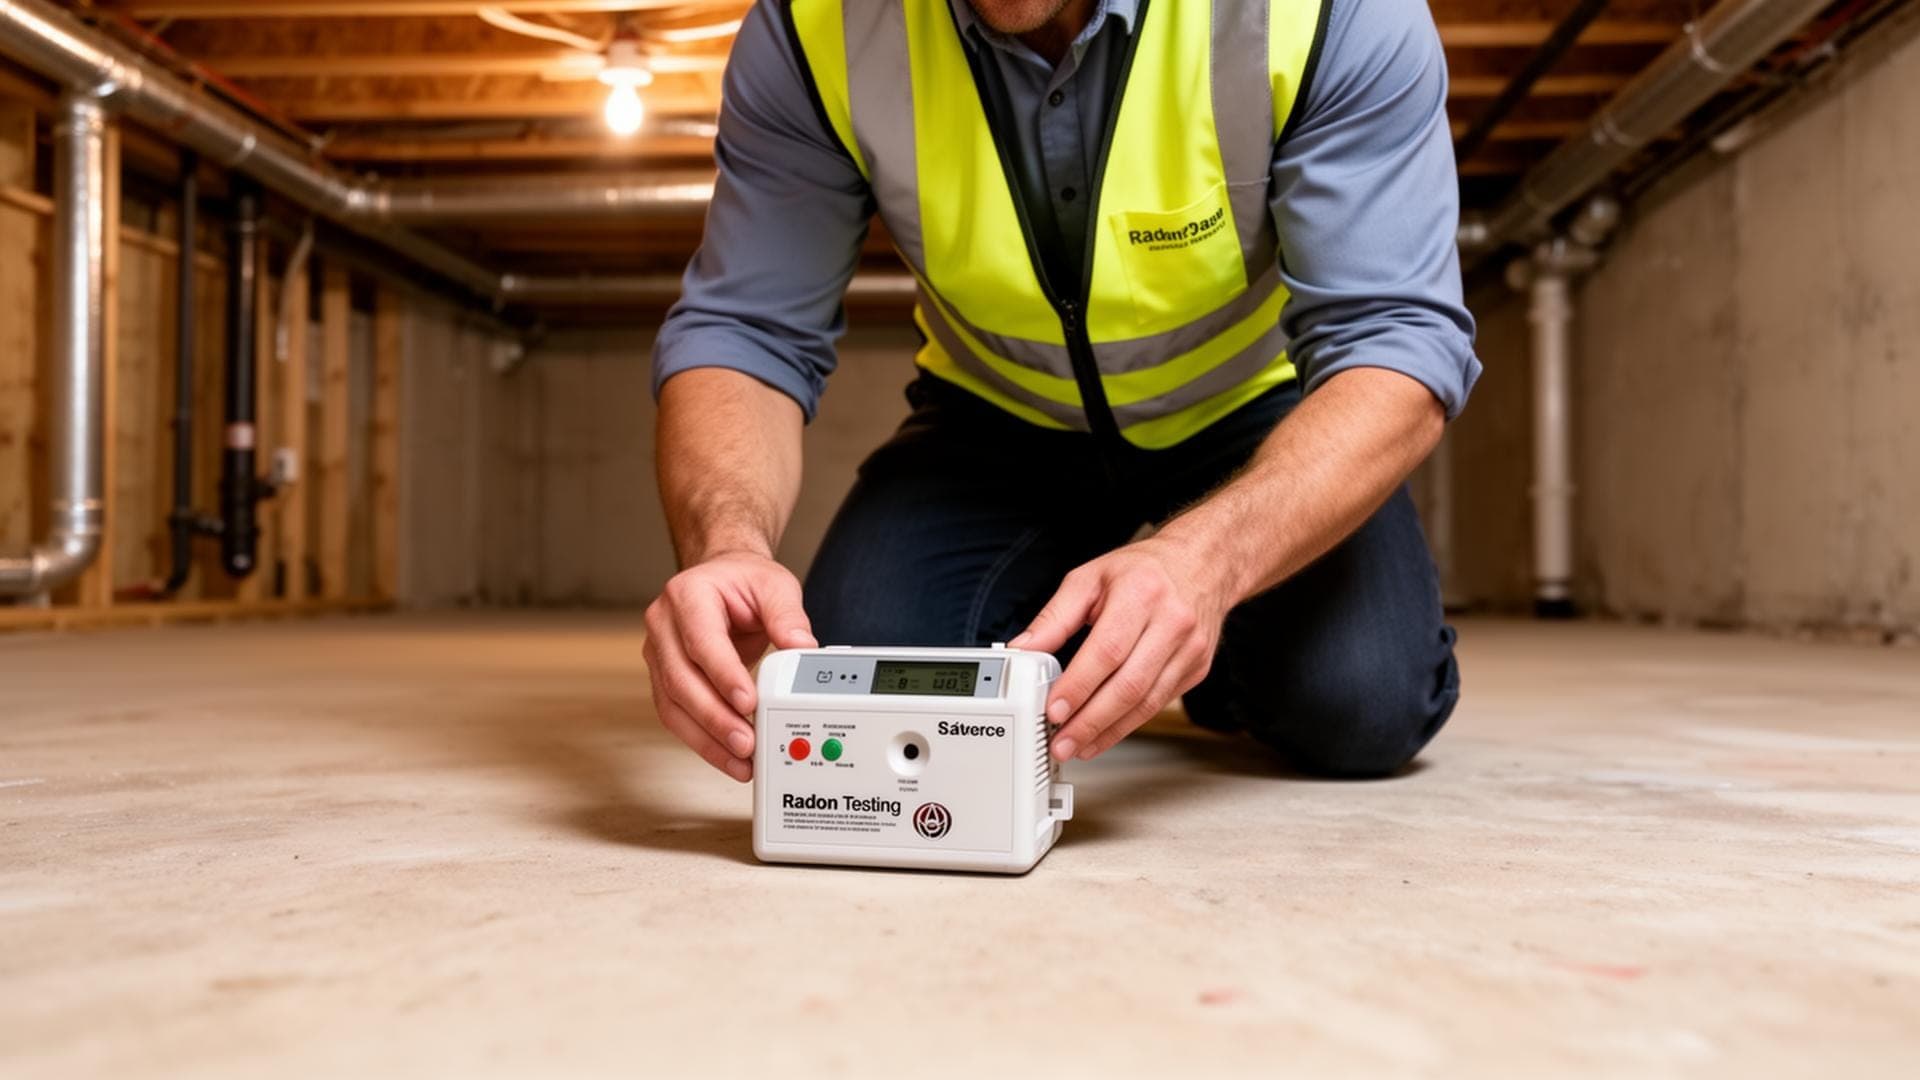
A radon test is only as good as its placement. Put the detector in the wrong spot, and you could get a reading that does not reflect what your family actually breathes. This guide covers the EPA's placement guidelines with practical, room-by-room advice.
1. General Placement Rules
- Lowest livable level: Test in the lowest floor of your home that is used or could be used as living space.
- Breathing zone: Place the device 20 inches to 6 feet above the floor. This represents the air you actually breathe.
- Away from drafts: Keep it at least 3 feet from windows, doors, and exterior walls. Air infiltration near these areas dilutes radon readings.
- Away from moisture: Keep the detector away from kitchens, bathrooms, laundry rooms, and any area with high humidity or standing water.
- Undisturbed location: Choose a spot where the detector will not be moved, bumped, or covered during the test period. Find answers to common radon questions on our FAQ page.
2. Best Rooms for Testing
Ideal Locations
- Basement family room or rec room
- Basement bedroom
- Ground-floor living room
- Ground-floor bedroom
- Home office on lowest level
Avoid These Rooms
- Kitchens (moisture, exhaust fans)
- Bathrooms (humidity, ventilation)
- Laundry rooms (moisture, dryer exhaust)
- Closets (restricted air flow)
- Utility rooms (near furnace or water heater)
3. Height and Position
The ideal height for a radon detector is in the breathing zone, which is 20 inches to 6 feet above the floor. A nightstand, end table, or bookshelf works well. Place it at least 3 feet from any exterior wall, 1 foot from any interior wall, and away from heating or cooling vents.
Quick Placement Checklist
- 20 inches to 6 feet off the floor
- At least 3 feet from exterior walls
- At least 1 foot from interior walls
- At least 10 feet from any exterior door or window
- Away from HVAC supply and return vents
- On a stable surface where it will not be disturbed
4. Locations to Avoid
Certain locations will produce inaccurate results and should be avoided.
- Near sump pits: Open sump pits concentrate radon. Placing a detector nearby will overestimate room-level exposure.
- In direct sunlight: Heat from sunlight can affect charcoal-based test kits and electronic monitors.
- Near ceiling fans: Air circulation from fans disrupts the air sampling pattern around the detector.
- On the floor: Floor-level readings do not represent the air you breathe at standing or sitting height.
5. Testing Multi-Level Homes
For homes with multiple levels, start with the lowest livable level. If that test shows elevated radon, you may want to test upper levels to understand how radon distributes through your home. Each level will typically show lower readings than the one below it. For a comparison of all available testing devices, see our radon test kit types comparison.
6. Closed-House Conditions
For accurate short-term test results, maintain closed-house conditions starting 12 hours before the test begins and continuing throughout the test period.
Closed-House Requirements
- Keep all windows and exterior doors closed
- Operate HVAC as normal (heating and cooling is fine)
- Avoid operating whole-house fans or attic fans
- Normal entry and exit through doors is acceptable
7. Common Placement Mistakes
Testing Only the Upper Floor
If your home has a basement or ground level, testing only on the second floor will underestimate radon exposure in the lowest lived-in areas.
Placing Near an Open Window
Even slightly open windows bring in outdoor air that dilutes radon readings, producing falsely low results.
Moving the Detector
Once placed, the detector should remain undisturbed for the entire test period. Moving it can disrupt the measurement and void the results.
Getting placement right is important because radon is a serious lung cancer risk. Accurate test results help you make informed decisions about protecting your family.
Frequently Asked Questions
Get Accurate Results with Professional Testing
Our professionals know exactly where and how to place monitors for the most accurate results. Learn about our testing services.